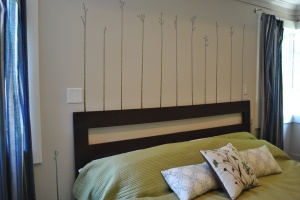
Cable wire wall decor

AFTER
Anyone else have a place with a big empty wall? We sure did…until this afternoon. We decided we wanted a way to share all of our current favorite pictures (no surprise our son was part of every picture we could find on our camera!) without having to buy a ton of picture frames (and put a million holes in the wall). We actually had some extra wire sitting around from another project and decided it should not go to waste. So, we ran out to the store to pick up a few things to attach it to the wall.
We needed a piece to screw into the wall that we would wrap the wire around, a clamp to keep the wire from sliding back out, and the longer piece is a the coolest…after connected you can turn it to tighten up the wire to keep it from sagging. Here’s a pic of the packages in case you want to do the same thing…

The equipment to hang the cables
Next step is to mark out where you want to hang the wires and the most important part is to make sure the wires are level. This is my most favorite tool in the house.

Getting everything level
Next step is to attach the pieces to the wall and thread the wire through and clamp it. Here’s a close up:

close-up of cable clamped on

magic cable tightener
Other end of the cable you’ll need to hook the tightening fastener on first then thread the wire through that piece and clamp it…and Voila!

The cables are up and ready for pictures
Now for the fun part:
We bought scrapbooking paper/cardstock since it is 12″ square so it would accomodate both vertical and horizontal 8×10 pictures that we wanted to print and still look orderly when hanging. Then I printed all my current favorite pics and opted for a faded border to blend right into the white paper. We simply used binder clips (that came in silver) to hang the pictures from the top AND and bottom so they will not be flapping around.

Pictures are up
Here’s the finished project! I love how easy it will be to switch out the pictures as time goes on…

AFTER
Have any other great ideas for huge empty walls? Anyone else want to try this project? Its well worth it. I think it would be great in a kids room full of all their drawings too!


