Our site has moved to http://www.diy-my-home.com
Pretty please visit this page http://diy-my-home.com/2010/08/twin-size-cutout-headboard-plan/ to see the plans for this headboard…

Twin bed with headboard

Our site has moved to http://www.diy-my-home.com
Pretty please visit this page http://diy-my-home.com/2010/08/twin-size-cutout-headboard-plan/ to see the plans for this headboard…
Twin bed with headboard
We love our most recent furniture project (KING size platform bed and headboard) SO much and think it would make a great kids bed too. Might even have to make this one in a toddler size too next year when Rory graduates from his crib. I’m just learning to use SketchUp design program so bear with me…here are the plans for a twin platform bed:
Twin bed with headboard

Underside of bed. Attach legs to plywood base.

Attaching the side rail boards
We visit Menards almost daily and somehow I had never even noticed this aisle. An aisle full of wall sayings, cool stick on decorations, and ‘not-your-grandma’s wallpaper’ (okay, that’s what I call it since there is no messy paste involved and it actually comes off without any trouble!)

If they really are moveable...I'm sold!
Here’s how they come out of the package…

The stickers
Time to stick them on the wall…

Getting started
And here’s the final (for now) result.

complete...for now
I’m already planning to move them down so you can see them through the headboard cutout. Thoughts…Yes? No?
What do you think about stickers on the wall? Too childish? or fabulous?

Headboard
Here’s how it was made:
We used (5) 1×6 boards and cut them to the width of the bed (which was 86 inches in our case). Attached those to some 1x4s we had on hand.

Yep, that's me cutting our boards down to the width of the bed

Then we sand 'em smooth

Square it up and start drilling
I pre-drilled the holes and put 2 screws into each board. Also left 9″ legs on the bottom since this is the height of our bed and I wanted the headboard to sit on the floor.

Here's what the back looks like completed
Next it’s time to paint the front so I picked up 2 cans of Kona Brown color paint to match the bed frame.

Here's how far 1 can of paint got me...
The second can was plenty to finish this job and touch up any light spots. After patiently waiting for it to dry so I could carry it in…here’s the final result:

Voila! Bed is now complete. Time to work on those walls and new curtains.
Can you believe how much they sell headboards for at the store? I think this project came in around $25 total including the paint…and a DIY ego boost (you don’t get that anyplace else!)

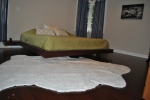
Soft & snuggly, ignore temp curtains and naked walls
I have been dreaming of a VERY snuggly soft rug under our new KING bed (see how we built bed frame for $26 and topped it w/ a mattress and new bedding for under $400 total here) but not willing to pay many-hundreds of dollars, I came across a solution and ‘how-to’ on another blog I like to read. Here is their article if you are curious: Young House Love. They made faux sheepskin rugs & throws out of a shaggy rug and also faux fur fabric to place throughout their house (and even under their Christmas Tree!..Brilliant, I say!). So, an hour later I was at the fabric store contemplating if the bolt of fur would be big enough…and less than 24 hrs later it was in my Master Bedroom.
If you can make little ones, then I’m sure you can make BIG ones, right? I guess mine resembles a polar bear instead?! Some people might hate this idea and this look and to each their own…but I sure like how it feels on my feet 🙂 Here’s how I made it…


Anyone else enjoying any furry or faux ‘friends’ in your home? I’ve never really been into fur before but sure feels nice and our cats and baby seem to like it too!
P.S.-Fabric was $19/yd and I bought 2.5yds x 60″ wide (So, it was $50 which I consider to be quite a deal for a rug). We are keeping it in place with a 4×6 non-skid carpet pads and a little carpet tape on the outer edges. Could have bought a bigger carpet pad and cut it the same way though!
Voila! Bed is now complete. Time to work on those walls and new curtains.
We have been wanting to upgrade to a King bed since and I added a second body pillow to our bed…that made the Queen bed just TOO small.
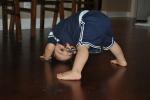
We shopped around and decided we wanted a low platform bed to accomodate our little guy. He LOVES to climb around on our bed and do ‘surprise trust falls’ (randomly free falling backward and loving it). I of course have to watch him like a hawk and have go-go-gadget arms to catch him every time and make sure he doesn’t fall off the bed (which was quite high off the ground before).
Dave really wanted to break out his new mitre saw and put it to use…so there was no option better than building it… (You could easily make this without mitering the corners too) We both really like the ‘floating’ look so we made a platform out of scrap plywood we had leftover from other projects, attached hidden legs to the height we wanted (8″)and hid the plywood with painted 1×4 boards. We assembled it in our room after spray painting the boards. Here’s a peek at the assembly:

platform with edges going on

Attached top boards to hide plywood
After it was assembled Rory was excited play before we even finished with the floating nightstands.


Floating attached nightstand (& peek at the leg)

Nightstand hidden compartment

underside of nightstand top
Here’s a link to the $25 headboardand a soft rug. Time to finish the rest of the room with a dresser, new curtains, etc…
Here’s an even simpler project we made using the same 1×4 boards and paint in the Master Bathroom.(mirror)
